Posted on

The School of Calisthenics

School of Calisthenics

The School of Calisthenics will see you now!

We have some exciting news.  We have been working with the guys at ‘The School of Calisthenics’ based in Nottingham and we are pleased to announce that Xorbars will be endorsing their calisthenics training programs along with their workshops and classes.

The School Of Calisthenics

Why Choose the School of Calisthenics?

There are many training programs, videos and people out there offering their incite into calisthenics training and like with all things some of it is good and some of it no so.  Here at Xorbars we take a great deal of pride in our calisthenics products and therefore will only tell you about people and companies that take the same level of pride in what they do.

These guys are serious professionals. We are talking Sports Science Degrees here not that quick two week course on personal training.  They clearly understand the human body and how to maximize your training progression quickly and safely.  So what are you waiting for?  Take a look at the three main ways the School of Calisthenics can help you achieve the impossible!

The Calisthenics Framework to Training

The School of Calisthenics Framework provides athletes with a progressive system that enables students to learn and achieve the various skills and movements in calisthenics. The calisthenics framework used by the School of Calisthenics caters for all ability levels, and will provide you with the exercises necessary to begin or support your calisthenics journey. Applying the framework and training at the right level of difficulty will support you to achieve your calisthenics goals.

All you have to do is add is some time, persistence and consistency. Do that and the framework will take you there.

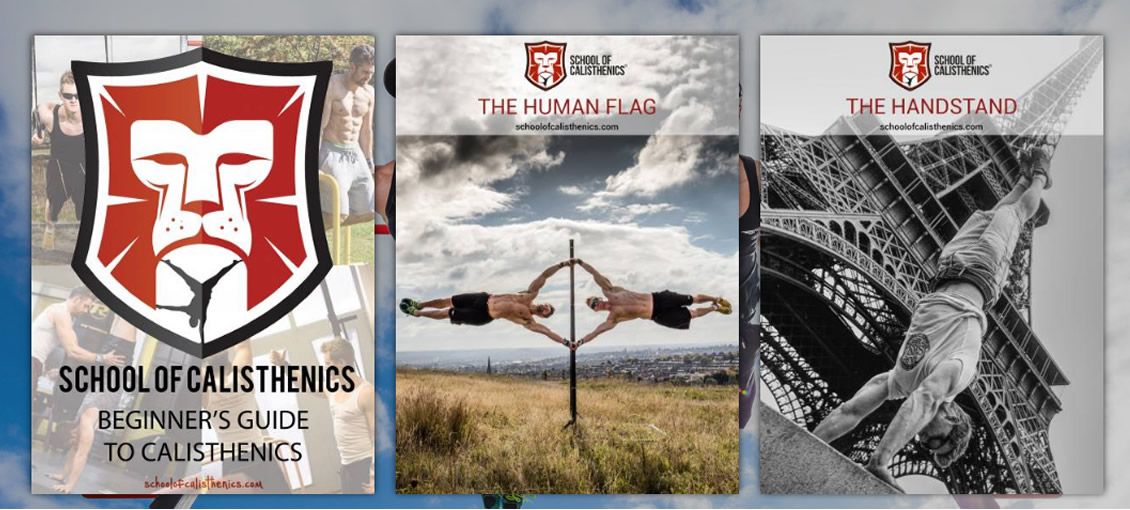
Options 1: Download their Calisthenics Training Books

The School of Calisthenics has free training books on calsithenics as well as some specialist training books on those must master movements like the human flag – and yes with these guys, you really can do it.

Option 2: Sign up for their Virtual Classroom

  • Beginners Online Training Classroom: Follow the weekly beginners lessons to develop your skills, build strength and get fit. With lessons and tests on mobility, strength and skill development.
  • Join the Virtual Classroom and become part of a community of like minded calisthenics ‘students’ to help support and encourage each other.
  • Challenge yourself and develop your calisthenics skills at your own pace with lessons, hints and tips from our expert tutors.
  • Powered by Edufii, a purpose built app designed for coaching and education our tutors will give you personal individualised coaching and feedback.
  • Don’t get stuck and frustrated, join the virtual classroom and get coached from anywhere in the world.
  • Sign up for the Beginners Classroom for only £9.99 ($12.49) per month.
  • NO CONTRACT, CANCEL AT ANYTIME

Option 3: Take Part in their Calisthenics Workshop

That’s right!  You can actually train with these super fit guys and take your calisthenics training to the next level. The tutors provide workshops not just teaching the School of Calisthenics Framework but educating you in understanding how to develop and to continue to progress your calisthenics journey.

“Great progressions and suitable for all levels. Stimulated both mind and muscle. The tutors created a great learning environment which was challenging but fun!” – Owen Jackson

School of Calisthenics
39 Fernleigh Avenue,
Nottingham
UNITED KINGDOM
Tel: 07738008145
Posted on

New Installation Check List

outdoor pull up bar installation

As always here at Xorbars our team is working hard to think up ways to make the installation of your outdoor pull up bar or garden gym as easy and as simple as possible, which is why we now have an online PRE-INSTALLATION check list to help our installers know a little more about your garden prior to their arrival.

After placing an order for an installed outdoor pull up bar or garden gym you will be asked to complete the following form: THE CHECKLIST

Why is the Checklist so important?

One of the tricky parts of installing outdoor pull up bars throughout the UK is that we don’t get to see the site (your garden) until the actual day of the installation.  Which as you can probably imagine can sometimes cause a few issues…read on…

A recent pull up bar installation story…

It was a beautiful day and after finally finding the customers house we parked up ready to get going.  What we didn’t know was that the customer wanted us to install his outdoor gym at the back of his garden about 100 meters away from the drive.  Normally not a problem.  However in this case, the back of the garden was also up what is best described as a mountain.

We painstakingly ‘lugged’ all the tools up the aforementioned mountain only to the find that the hose would only reach about half way up.  So out came the buckets – imagine one of those 80’s martial arts training montages.

Now it was a lovely sunny day and the customer was a delight, rewarding us with a couple of bottles of Champagne for our troubles.  But it would have been much easier if we would have know a little bit more about the location prior to our arrival.

So once you decide on your perfect outdoor pull up bar or garden gym and want Xorbars to install it for you, then we will kindly ask you to complete our garden pull up bar installation checklist.

‘Unleash Your Pulling Power’

The Xorbars Team

Posted on

Ash Dykes Outdoor Pull Up Bar

Xorbars are pleased to announce that the British Adventurer Ash Dykes has been getting the most out of his recently added Xorbar Outdoor Pull Up Bar.

Ash is an extremely accomplished adventurer and we hope that through Xorbars he can take his training to another level and look forward to hearing about his next epic adventure.

ashdykeslogo

More About Ash Dykes

British Adventurer, Extreme Athlete, 2X World First Record Holder, (FHM:- “One Of The Worlds Most Fearless Outdoors Men”). (Wales Online:- “7th coolest person in Wales”). Speaker, Muay Thai Fighter, Master Scuba Diver.

Ash has been invited to 10 Downing Street on two occasions after his feats, was shown social support by Bear Grylls, Sir Ranulph Fiennes, Duncan Bannatyne and won the 2015 UK Adventurer of the Year Award and the 2016 Welsh Adventurer of the Year Award.
He was featured on The Times, Forbes, The Guardian, Mail Online, BBC World News, ITV, Arise TV, Discovery Channel, Channel 5 etc.

In 2014 – Ash became the first person ever to walk across Mongolia solo & unsupported, over the Altai Mountains, Gobi Desert & Mongolian Steppe, 1,500 miles in 78 days whilst pulling 120kg in a wheeled trailer carrying provisions needed to survive.

In 2016 – Ash became the first person ever to traverse Madagascar’s length, through it’s interior taking on eight of the highest mountains on the fourth largest island in the world, 1,600 miles in 155 days. Tackling Desert, Savannah, Tropical dry forest Jungle, Mountains and facing many mishaps along the way.

From the age of 19, Ash boarded a plane & left to explore what was out there, this lead him to undertake the following exploits, to name a few: –

• Cycling Cambodia & the length of Vietnam (1130 miles – 15 days)
• Trekking the Himalayas in North India
• Cycling a part of Australia (700 miles – 13 days)
• Escaping the outback’s of Australia after a nasty break down in the wildAsh Dykes
• He learnt how to survive in the jungle with a Burmese Hill Tribe
• Cycled the length of Britain for charity (985 miles – 7days)
• Walked 200 miles across Wales in the dead of winter
• Trekked alone through the Alps during winter & was just missed by a landslide
• Worked as a scuba diving instructor for two years in Thailand
• Trained & competed against the locals, in the local martial art or Muay Thai (Thai Kickboxing

To find out more about ash please visit:

Ash Dykes Website

Ash Dykes Facebook


Posted on

Back Levers with Xorbars

back levers tutorial

How to do the Back Lever exercise, muscles worked, and a video tutorial.

Often performed in Calisthenics, Street Workout, and CrossFit, the Back Lever is one of the fundamental static strength holds in Gymnastics. It can be performed on rings, or a pull-up bar.

This was one of the first impressive gymnastic holds that I managed to attain. I remember feeling such a sense of accomplishment when I could do the straight-leg (“Full”) version.

Muscles Worked

Where do I start? This is a total body exercise!

The Back Lever is a static strength exercise. I find it works my Lats, Upper Back and Posterior Deltoids (Shoulders) very hard.

Surprisingly, one of the weakest links is the lower back.  Most people aren’t used to lifting their hips up like this in any gym based exercises—so you may find that you’re strong enough in the upper body to hold the position, but too weak in the lower back to extend your legs.

Other supporting muscles worked to a lesser extent are the Abs, Glutes, Pectorals and Quadriceps.

Prerequisites for the Back Lever

  • Must be able to do Skin the Cat [Here] for 15-30 seconds continuously, otherwise you might rip your shoulders off. ? Preferably you can also roll back up in a tucked position
  • 6 Pull-ups or Chin-ups

Back Lever Exercise Technique

Always begin exercise with a dynamic stretching warm up [Click Here].

Then do a few reps of Skin the Cat in a not very taxing manner, to further warm up the area and avoid injury.

The Back Lever puts a lot of strain on your shoulders, biceps and elbows, so it’s best to really take your time moving from one progression to the next, otherwise you can end up with an injury thattakes months to recover from. 

  • Progression 1: Tuck Back Lever
  • Progression 2: Advanced Tuck (similar to the shape of a dining room chair)
  • Progression 3: One-leg straight
  • Progression 4: Alternating one-leg straight (like bicycling)
  • Progression 5: Full Back Lever (straight legs)

After this you can progress to Back Lever Pullouts, which is doing the Back Lever down to Skin the Cat, and then pulling your body back up to an Inverted Hang.

Pullouts are a lot harder than lowering! Once you’ve mastered the Full Back Lever as a static hold, you may find you’re only able to do Pullouts with a tucked body (rather than straight legs). It’ll take time to build the strength to do it with straight legs.

Watch the video tutorial


Technique faults to look out for

  • Body not horizontal — you’ll make quicker progress when you practice this exercise with a Calisthenics Instructor, rather than on your own, as you think you’re horizontal, but you’re probably slightly above it
  • Hand width — don’t make the grip too close, otherwise you won’t be able to do pullouts

George Choy (Certified Calisthenics Instructor)

For more information on George Choy or to visit his excellent website for more workouts and healthy eating tips and recipes, please visit www.busyparentfitness.com

Posted on

Inverted Rows using Xorbars

back rows

This blog post will teach you why Inverted Rows (a.k.a. Body Rows, Australian Rows or Incline Rows) are great for your upper back and arms, how to get started, and how to progress the exercise from relatively easy, to brutal!

Why you should do Inverted Rows

One of the problems of exercising in the gym, particularly for a relative beginner, is you’re just not lifting heavy enough.  Consequently, pull-ups may seem way out of reach. So you just grind out a few reps with dumbbell or cable rows, and the lat pulldown machine, with what you think is a moderately heavy weight.

It’s only when you start doing Inverted Rows, that you realise you were taking it way too easy on yourself. Inverted Rows are suitable for all strength levels, as you can progress the exercise from super-easy, to so difficult that you can’t even perform 1 repetition!

If you suffer from lower back pain, then Inverted Rows are a much better alternative to dumbbell or barbell rows, as this exercise puts a lot less strain on your lower back.

It also works in the opposing direction to the Bench Press or Push Up, so can help to correct that hunched-forward “ape” look, if you’ve been over-doing it on the horizontal pressing.

Muscles worked by Inverted Rows

This is a great overall exercise for the upper-back and arms. It helps to create that V-shape by working the Lats (that muscle under your arm-pit), Rhomboids and Trapezius (middle back), rear Deltoid (shoulders), and Biceps.

Once you get started on the rows, you’ll soon discover that the exercise also works your core, as it’s like a moving plank.

Equipment Required

You can do this exercise with a static bar. But if the bar is completely fixed, then it’s difficult to progress. If you’re in a gym, then the Smith Machine is perfect for this exercise, as you can adjust the height of the bar to increase the difficulty level.

My preference for this exercise is suspension equipment, such as gymnastics rings, or TRX, as you can put them up anywhere and they are easily adjusted.  They also make the exercise more difficult than performing on a bar, due to the stability issue.

Warm Up

Always begin exercise with a dynamic stretching warm up [Click Here].

If you’re going to try low reps with maximum resistance, then additionally do 1-2 warm-up sets of easier Inverted Rows beforehand.

Safety

Safety first—check your equipment is definitely fixed and can take your weight before you start leaning back.

I always jump up onto my gymnastics rings in a dip position, or just hang underneath with tucked legs, before I start my first set.  Things can move, so I always perform this double-check.

If cables are sliding, then you haven’t fixed them correctly.

Inverted Rows—Technique

I’ll refer to the anchor point during the technique—assume this is where the rings or TRX are hung, and there’s an imaginary vertical line from there straight down to the floor.  If you’re using a fixed bar, then it’s that.

For your first time, set the level of the rings or bar just under chest height, then adjust afterwards, depending on your strength levels.

Getting in Position-Inverted Rows—Why And How You Should Do Them - VISIT BusyParentFitness.com #followme #instalike #fitnessblogger #fitspo #traininsaneoremainthesame #beastmode #mblogger #dblogger #pblogger #FitnessFriday #fitfam #exercise #workout #fitness #outdoorfitness #gainz #CrossFit #Bodyweight #fitdad #FitdadsofIg #fitdaddy #thefitandactiveparents #muscle #lats
I exercise on a customised Xorbars Multi-Gym in my garden xorbars.co.uk

Starting position:

  • Stand facing the anchor point and grip the:
  • Rings / TRX in a neutral “hammer” grip position.
  • bar with an over-hand grip (palms facing away from you), shoulder-width apart.
  • Walk forward slightly, to ideally create a 45 degree angle with your body (the further your feet go past the anchor point, the harder this exercise becomes).
  • Before you stretch your arms to lower your body, brace your core and bend one leg at the knee, to support yourself as you lower.
  • Then put both legs together.
  • When your feet get further and further away from the anchor point, I find it more comfortable to do the exercise on my heels, rather than a flat foot.

Inverted Rows-Start—Why And How You Should Do Them - VISIT BusyParentFitness.com #followme #instalike #fitnessblogger #fitspo #traininsaneoremainthesame #beastmode #mblogger #dblogger #pblogger #FitnessFriday #fitfam #exercise #workout #fitness #outdoorfitness #gainz #CrossFit #Bodyweight #fitdad #FitdadsofIg #fitdaddy #thefitandactiveparents #muscle #lats

Begin:

  • Keeping your entire body in a straight line (and remembering to contract your abs), pull your body towards the rings / bar.
  • Keep your elbows in, and “graze” the inside of your arms against your ribs, until your hands reach your chest.
  • Try to keep your chest puffed out, so that you get a good squeeze of the shoulder blades at the top. I like to hold it for 1 second.
  • If there’s slack in the cable, or you are standing completely upright with no effort, then position your legs further forward, to increase the difficulty.
  • After the squeeze, lower your body by extending your arms back to the starting position.
  • Remember to keep your body tight and in a straight line throughout the exercise (not bowed like a banana).
  • Repeat—pulling yourself back up again.

Inverted Rows-Finish—Why And How You Should Do Them - VISIT BusyParentFitness.com #followme #instalike #fitnessblogger #fitspo #traininsaneoremainthesame #beastmode #mblogger #dblogger #pblogger #FitnessFriday #fitfam #exercise #workout #fitness #outdoorfitness #gainz #CrossFit #Bodyweight #fitdad #FitdadsofIg #fitdaddy #thefitandactiveparents #muscle #lats

Finishing the exercise:

Bend one leg at the knee to help support your body, then stand up.

How to make Inverted Rows more difficult

Go horizontal

Keep walking your feet forward until your arms are hanging directly below the anchor point. Adjust the hight of the rings / bar so that your body hangs only a few inches from the floor.

Feet elevated Inverted Rows

Elevated Inverted Rows-Start—Why And How You Should Do Them - VISIT BusyParentFitness.com #followme #instalike #fitnessblogger #fitspo #traininsaneoremainthesame #beastmode #mblogger #dblogger #pblogger #FitnessFriday #fitfam #exercise #workout #fitness #outdoorfitness #gainz #CrossFit #Bodyweight #fitdad #FitdadsofIg #fitdaddy #thefitandactiveparents #muscle #lats

Elevated Inverted Rows-Finish—Why And How You Should Do Them - VISIT BusyParentFitness.com #followme #instalike #fitnessblogger #fitspo #traininsaneoremainthesame #beastmode #mblogger #dblogger #pblogger #FitnessFriday #fitfam #exercise #workout #fitness #outdoorfitness #gainz #CrossFit #Bodyweight #fitdad #FitdadsofIg #fitdaddy #thefitandactiveparents #muscle #lats
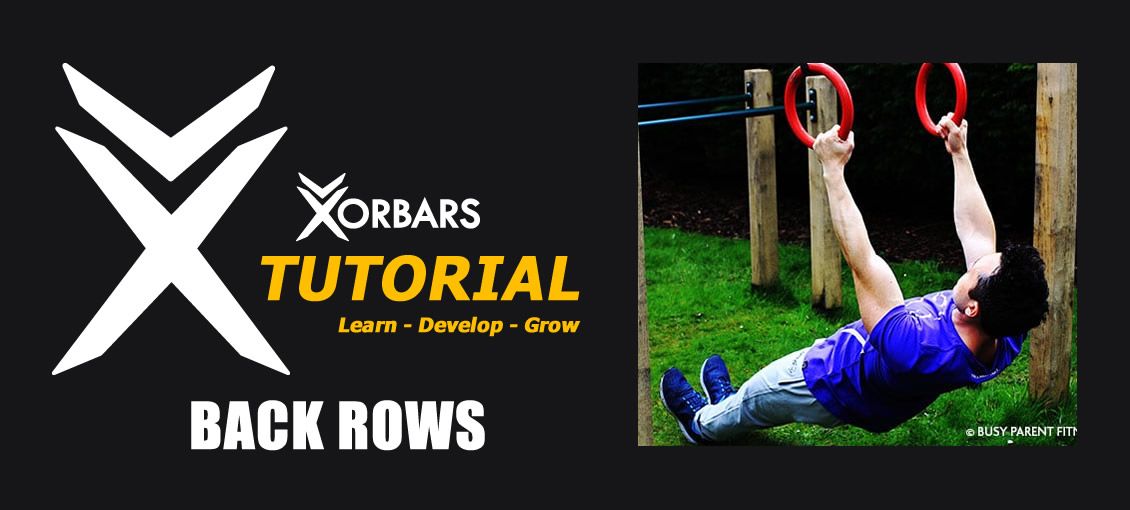
Hanging directly below the anchor point, put your feet on a bench and then row.

Front Lever rows

Tucked Front Lever Inverted Rows-Start—Why And How You Should Do Them - VISIT BusyParentFitness.com #followme #instalike #fitnessblogger #fitspo #traininsaneoremainthesame #beastmode #mblogger #dblogger #pblogger #FitnessFriday #fitfam #exercise #workout #fitness #outdoorfitness #gainz #CrossFit #Bodyweight #fitdad #FitdadsofIg #fitdaddy #thefitandactiveparents #muscle #lats

Tucked Front Lever Inverted Rows-Finish—Why And How You Should Do Them - VISIT BusyParentFitness.com #followme #instalike #fitnessblogger #fitspo #traininsaneoremainthesame #beastmode #mblogger #dblogger #pblogger #FitnessFriday #fitfam #exercise #workout #fitness #outdoorfitness #gainz #CrossFit #Bodyweight #fitdad #FitdadsofIg #fitdaddy #thefitandactiveparents #muscle #lats

This is a tremendous increase in resistance. Front Lever’s are a foundation exercise in Calisthenics and Gymnastics. Just holding the position is one thing…trying to row at the same time, is a whole new “ball game!” Most people will not be strong enough to do this exercise:

  • hang under the anchor point
  • tuck your knees to your chest, and lift your body up so that your back is reasonably horizontal. You’ll be facing the ceiling
  • pull your body to the handles / bar
  • hold the top position for 1 second if you can
  • lower under control, and keep your body horizontal throughout the entire exercise
  • as you become stronger, you can extend your legs, and push yourself further away from the anchor point, so that you look like your doing an upside-down push up—that’s the full Front Lever

George Choy (Certified Calisthenics Instructor)

For more information on George Choy or to visit his excellent website for more workouts and healthy eating tips and recipes, please visit www.busyparentfitness.com